Every client starts with an event. In EvntEazy, creating one takes about two minutes, and you come away with more than a record: you get a ready-made task checklist, a budget with the client’s ceiling already set, and a workspace for vendors, files and the run sheet.
All plansAvailable on every plan, including Free.
Before you start
Have these to hand. Only the name is required, and you can fill in the rest later:
- The client’s names (or the event name for corporate and social events)
- Event date and venue
- The client’s total budget, which becomes their budget ceiling
- Expected guest count
- Your main contact’s name, phone and email
Step 1: Enter the event details
- Open My Events in the sidebar and click + New Event. The counter beside it shows how many active events your plan allows.
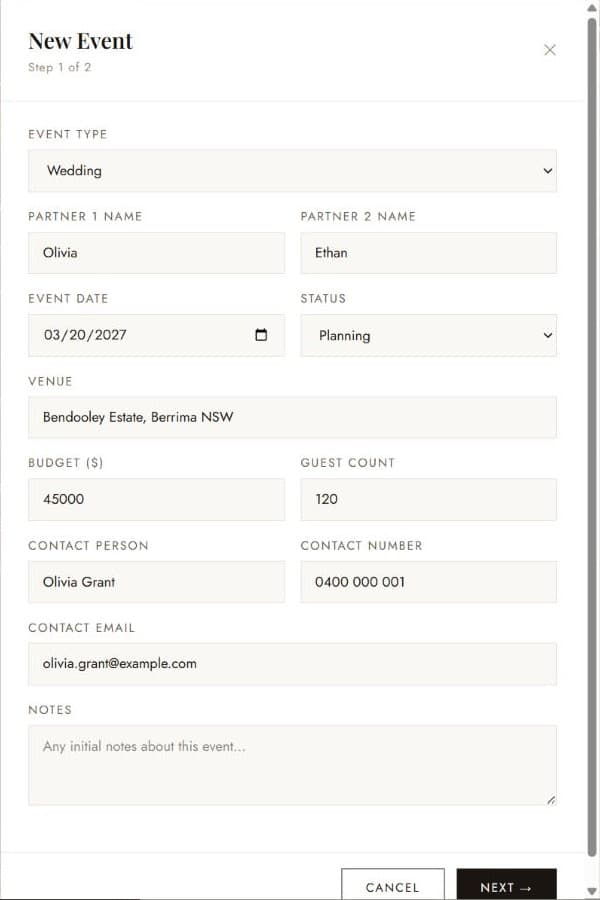
- Choose the Event Type: Wedding, Birthday, Corporate, Social, Graduation, Anniversary or Other. The type decides which default checklist you get in step 2.
- For a wedding, enter Partner 1 Name and Partner 2 Name. EvntEazy displays the event as “Olivia & Ethan” across your dashboard and the client portal. For other types, enter an Event Name and an optional subtitle.
- Set the Event Date and Status. Most new events start as Planning; switch to Confirmed once the contract is signed.
- Add the Venue, Budget ($) and Guest Count.
- Fill in the Contact Person, Contact Number and Contact Email, plus any Notes such as style preferences or dietary requirements.
- Click Next →.
Step 2: Review the starter checklist
EvntEazy suggests a checklist based on the event type. A wedding starts with 13 tasks, from confirming the venue booking and hiring a photographer to booking the cake and planning the rehearsal dinner. Birthdays, corporate events and the other types each get their own shorter list.
- Click into any task to rename it to match how you work.
- Click ✕ to remove tasks that don’t apply, such as a videographer the couple doesn’t want.
- Click + Add Task for anything missing from the list.
- Click Create Event.
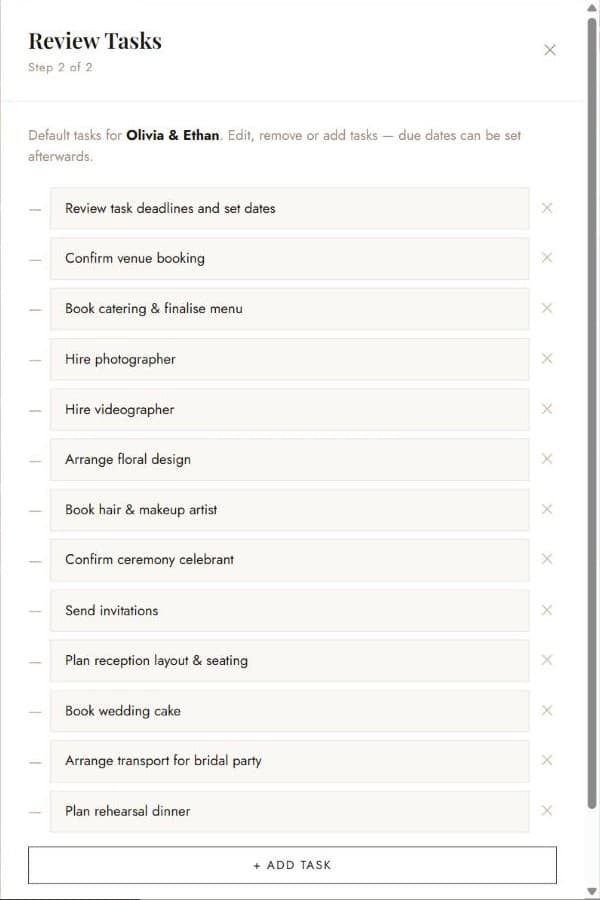
You don’t need to set due dates here. The first task, Review task deadlines and set dates, is due today as a reminder to do exactly that once the event exists.
What to do straight after
Your new event opens in its own workspace. A few minutes here sets you up for the months ahead:
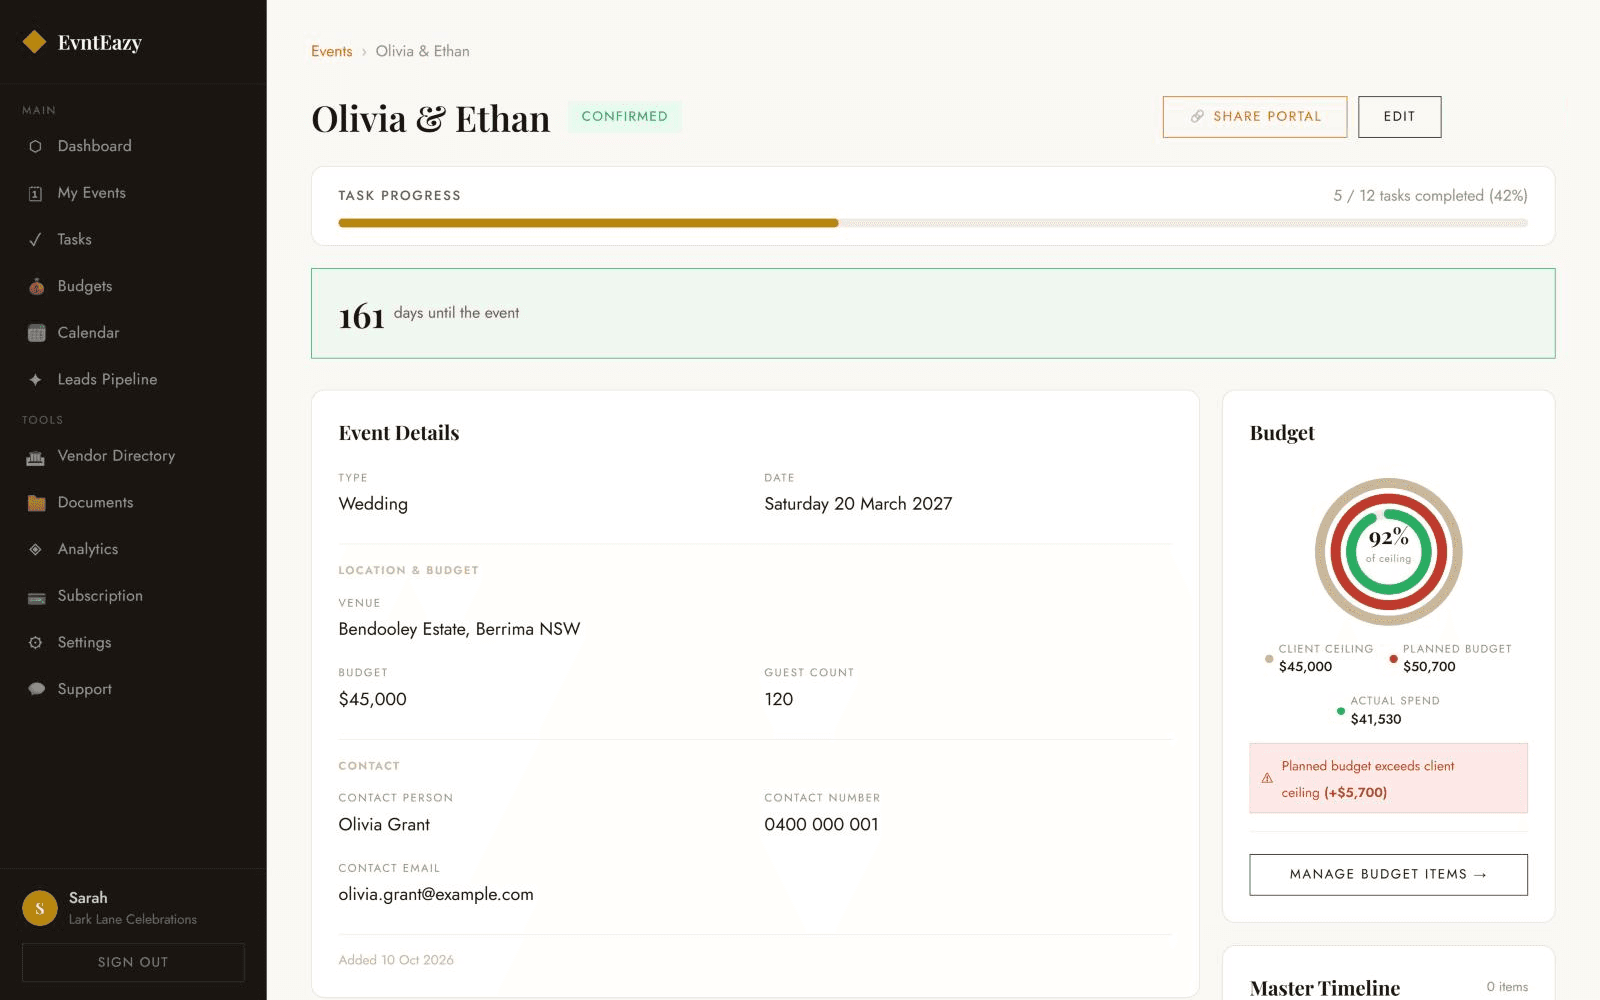
- Set due dates and priorities. Edit each task to give it a date, a High, Medium or Low priority, and a linked vendor if one is responsible.
- Star your key dates. Mark milestones such as the final menu tasting as a Key Task. They appear as key dates on the client portal.
- Add budget items. Click Manage Budget Items and list each supplier cost. See How to build a client budget.
- Attach vendors you’ve already booked (Professional plan and up).
How many events can I create?
It depends on your plan: Free includes 1 active event, Starter 5, Professional 20 and Agency unlimited. Change an event’s status to Completed or Cancelled when it’s done, and use the status filters on My Events to keep your list tidy.
Try it on your own events
Explore the live demo with sample data, or start free with one active event. No credit card required.
Questions? Email info@evnteazy.com or use Support in your dashboard. We read every message.