Open any event from My Events and you land on its event page: one screen that answers “where are we up to?” for that client. This guide walks through each panel, top to bottom, and how planners use it day to day.
All plansAvailable on every plan, including Free.
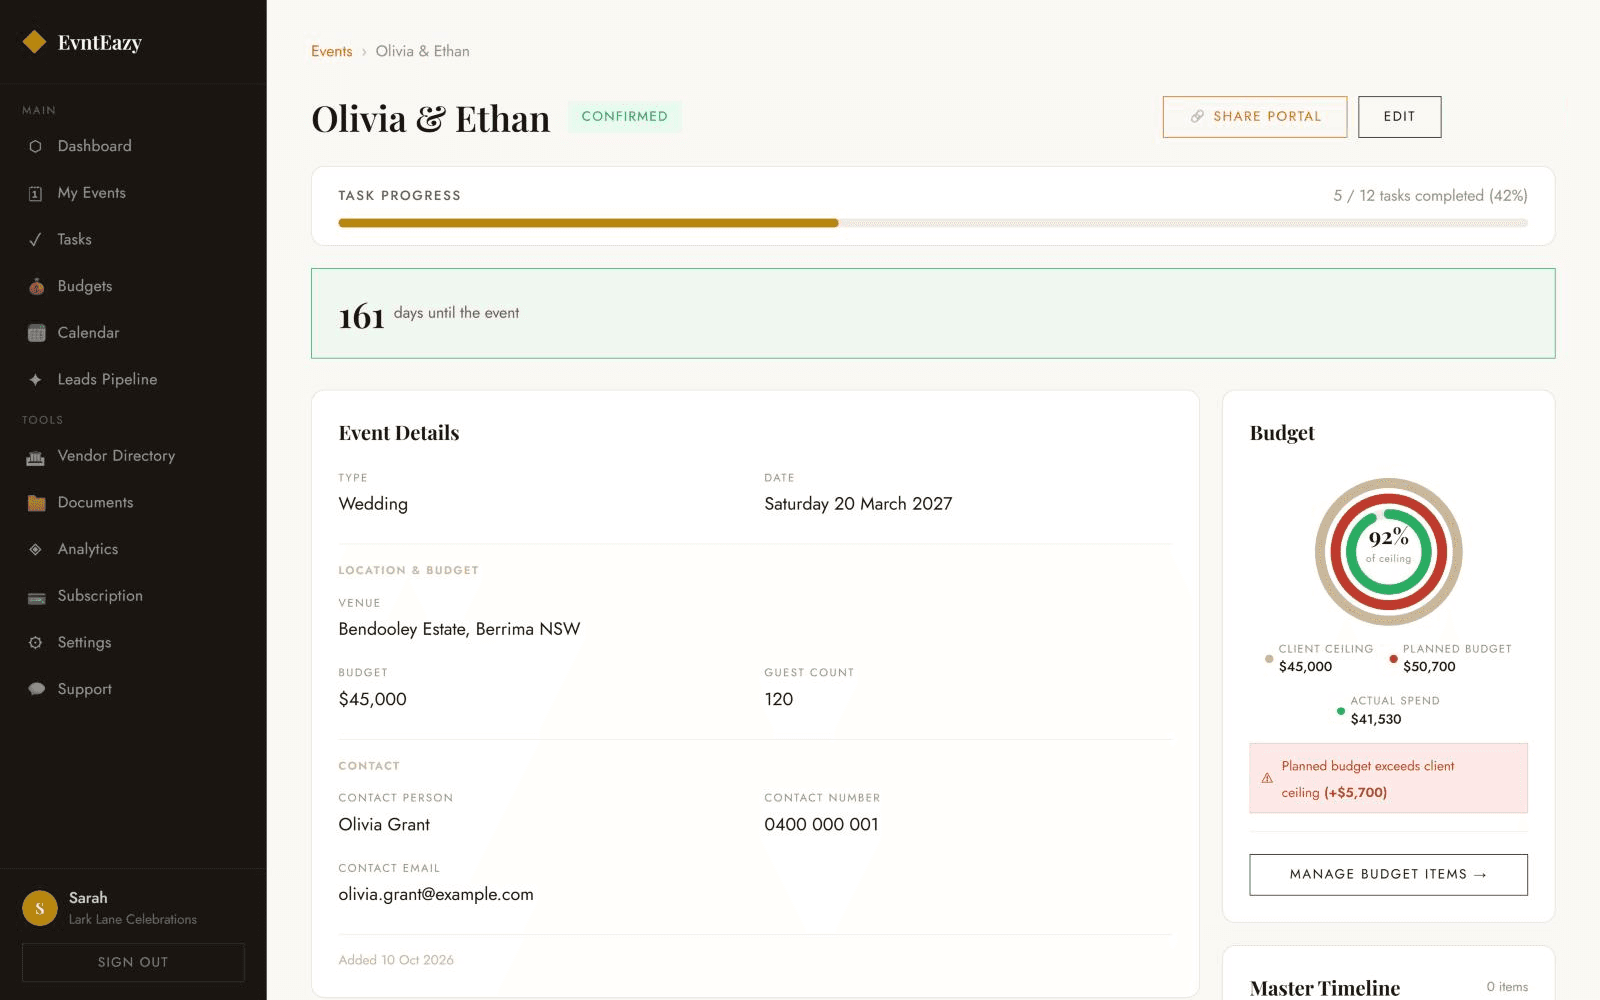
The header
At the top you’ll see the event name and its status badge (Planning, Confirmed, Completed or Cancelled), plus three buttons:
- Share Portal gives you the client’s private portal link. See How to share a client portal.
- Edit updates any detail you entered when creating the event, including the status.
- Delete removes the event after a confirmation. To keep the history, set the status to Completed or Cancelled instead.
Task progress and countdown
The progress bar shows how many of the event’s tasks are done, for example “5 / 12 tasks completed (42%)”. Below it, the countdown shows the days until the event. Together they tell you at a glance whether you’re on track.
Event details
The details panel holds the event type, date, venue, the client’s budget, guest count, the contact person with their number and email, and your notes. Use the notes for anything you’d otherwise keep on a sticky note: dietary counts, style direction, family sensitivities.
Payments Due
This panel appears when the event has an unpaid deposit or balance with a due date. Each row shows the category, line item, whether it’s a deposit or a balance, the due date and the amount, sorted soonest first. Tick the box on the right to mark it paid and it drops off the list.
Payments Due is built from your budget items. Read How to track deposits and balances to set it up.
Tasks
The task list is where most of your day-to-day work happens:
- Tick a task to mark it done. Progress updates straight away.
- Click + Add Task to add one with a due date, priority, notes and an optional linked vendor.
- Click ✎ to edit a task or move it between To Do, In Progress and Done.
- Toggle ☆ Mark as Key Task for milestones. Key tasks show a gold star here and appear under Key dates on the client portal.
Budget
The budget ring compares three numbers:
- Client Ceiling: the budget you entered for the event
- Planned Budget: the total estimated cost of your budget items
- Actual Spend: the total actual cost so far
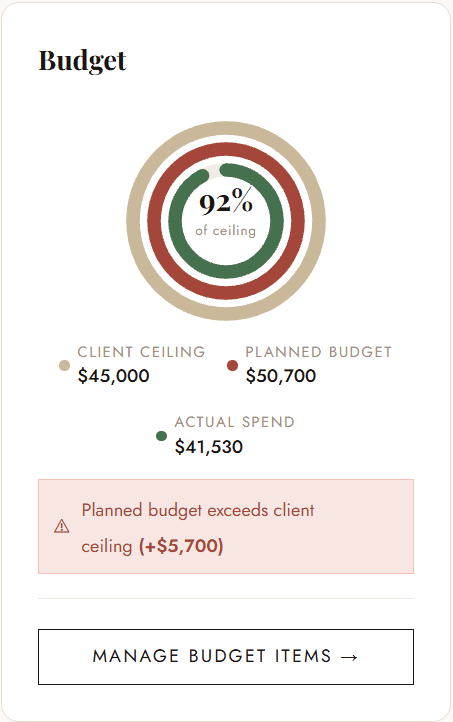
If the planned budget goes over the ceiling, actual spend goes over the plan, or actual spend goes over the ceiling, a red warning shows the amount. Click Manage Budget Items → to open the full budget table.
Master Timeline
The master timeline is your run sheet for the day. Click Manage Master Timeline → and add items with a time, activity, location, vendor and notes, for example “3:00 pm, Ceremony begins, Garden lawn”. Items sort by time automatically, and linking a vendor puts their contact details right beside the moment they’re needed.
Vendors
Every supplier attached to the event is listed with their category and status: Enquired, Booked or Confirmed. Click Manage Vendors → to attach suppliers from your vendor directory. Booked and confirmed vendors also appear under Your suppliers on the client portal. Vendors are included on the Professional and Agency plans.
Files
Click + Upload to keep contracts, run sheets, mood boards and photos with the event. You can download or delete them here, or browse every file from Documents in the sidebar. File storage is included from the Starter plan up.
A simple weekly routine
- Monday: scan Payments Due and the budget warnings for each active event.
- Daily: tick off tasks and add new ones as the client’s plans change.
- After every supplier conversation: update the vendor status and the actual cost.
- Two weeks out: finalise the master timeline and upload the run sheet.
Try it on your own events
Explore the live demo with sample data, or start free with one active event. No credit card required.
Questions? Email info@evnteazy.com or use Support in your dashboard. We read every message.